As a post 1930 Military History Researcher (primarily), it is interesting when coming upon campaigns & engagements which occurred in the Pacific region during the Second World War with many of them right on our doorstep, but were not always widely reported or written about, and thus are not well known!
Ostensibly because at the time either clandestine in nature, or our losses were so significant resulting in the Commonwealth government disallowing full disclosure so as to mitigate panic e.g. The details of the attack on Darwin were secured under the Official Secrets Act until February 1992.
PREAMBLE:
Following the Japanese Army’s initial attack at Kota Bharu on the British held Malaya peninsula one hour prior to the attack on Pearl Harbor, the Commonwealth government correctly determined that Darwin may well be a target as would the Netherlands East Indies (N E I) – now Indonesia.
When US President Franklin D. Roosevelt placed an Oil and Gasoline embargo on Japan on August 1st, 1941 and Japan needed Oil, the N E I colonies with their vast oil supplies became an immediate and obvious target.
THREATS
Papua, New Britain and New Ireland. These were Australian mandated territories; Papua since 1906 and further to the east in the SW Pacific are the islands of New Britain and New Ireland which became Australian mandated territories post the Versailles Treaty following World War 1.
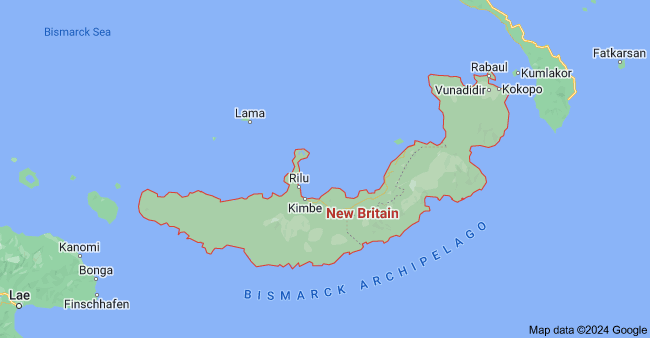
New Britain had specific strategic importance for Australia as did its principal township Rabaul which offered a large deep-water port and a very good air-field.
Japan’s military planners also knew this!
In February 1941 as a defensive strategy, the Commonwealth government required the Australian Army to raise a force to be deployed to Rabaul and Kavieng in New Ireland to defend them in the event of enemy attack.
Darwin: Correctly assuming Darwin was on Imperial Japan’s radar either by way of an invasion force or from the air ensured plans were underway by mid-December 1941 to relocate Darwin’s civilian population prior to Christmas 1941.
Simultaneously Darwin’s Military strength was increased significantly.
Unfortunately, almost all of the Royal Australian Navy’s Fleet were serving with the Royal Navy in the Atlantic, the Mediterranean and Indian Ocean while the RAAF had only a handful of aircraft available at the time, meaning neither the NAVY or the RAAF could not offer much resistance if and when an attack came to Darwin. Few additional aircraft could be spared for Darwin defenses.
Ammunition for the machine gun emplacements in Darwin and surrounding Darwin harbor was also in very short supply.
Timor: As early as February 1941, the Commonwealth government had met and agreed with Dutch and British Officials that Allied Forces, under Australian command would reinforce Dutch Timor, should Japan enter the war.
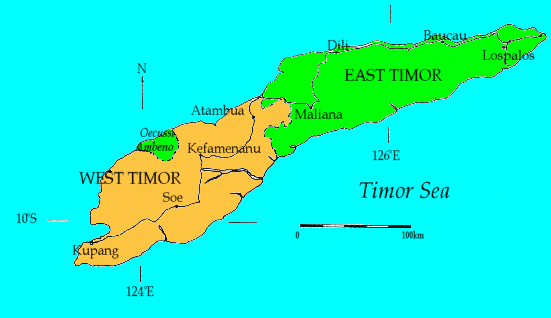
YELLOW – Dutch Timor
GREEN – Portuguese Timor
Ambon Island: Ambon is located in the Malucca Islands about 600 air miles from Darwin, and just south of the much larger Seram Island. Despite being one of the islands of the N E I outlying regions, the Dutch knew Ambon had a strategic importance as an air-base and had been reinforcing its defenses since 1941, adding Royal Netherlands East Indies soldiers from Java.

Yet as far back as 1940, Australia also saw the Ambon’s significance as a nearby stepping-stone for Japanese Forces to attack Australia from the north, such were the forward thinkers of some in the Menzies government and our military planners at the time.
DEPLOYMENTS:
Rabaul - New Britain
An Australian Army contingent designated Lark Force was raised in March 1941 and shortly thereafter deployed to Rabaul to defend the strategically important harbors and air-fields.
CO Lark Force
Under the command of Lieutenant Colonel John J. Scanlon, it was a composite force and consisting of 1,400 + men and some women from:
2/22 Battalion
17th Anti-tank Battery
Detachment from the Royal Australian Artillery
A company from the Royal Australian Engineers
An Anti-aircraft Battery
Signals, Supply and Medical detachments, including Australian Army Nursing Sisters (AANS)
2/10th Field Ambulance
1st Independent Company – NZ
80 Militiamen from the New Guinea Volunteer Rifles
Lark Force was tasked with defending the territorial capital of Rabaul including its two air-fields, its vast deep-water port and its seaplane anchorage but they could only be provided with equipment considered obsolete and thus had the onerous task with only limited fire power.
The Rabaul defensive line stretched 15 miles and it was anchored by a 2 x 6-inch coastal defense guns and just 2 x 3-inch anti-aircraft guns. On the afternoon of December 7th following the Pearl Harbor attack, the RAAF dispatched 4 x Lockheed Hudson light-bombers and 10 x Wirraway fighters to Rabaul, but they could do little to blunt an attack when it came.
East Timor
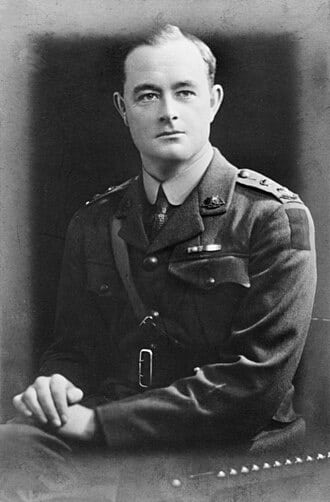
First CO of Sparrow Force
Sparrow Force was formed to defend the island of Timor from invasion by the Empire of Japan. It consisted of a detachment from the 2/40th Australian Infantry Battalion, a Commando Unit from the 2/22nd Independent Company PLUS other Dutch, British, US and Australian 8th Division units.
The force began deploying in early December 1941, and following Japan’s entry into the war, it was drawn into the fighting in response to the Japanese invasion of both Portuguese AND Dutch Timor, in February 1942.
Embarking in Darwin, 957 men arrived on Dec 10 and a further 445 from Darwin reached Koepang on December 12, 1941. They were under the command of Colonel J. Leggatt DSO, who was later replaced by Brigadier Veale.
Ambon
At the outbreak of the Second World War across the Pacific on December 7, 1941, Ambon was already garrisoned by the 2,800 strong Malucca Brigade of the Royal Netherlands East Indies Army (KNIL), commanded by Lieutenant Colonel Joseph Kapitz which consisted of Indonesian colonial troops under European officers.
However, the garrison was poorly equipped and trained, partly as a result of the Netherlands having been defeated and occupied by Nazi Germany. The KNIL units were not equipped with radios and relied on landlines and written communications. They included 300 partly trained reservists.

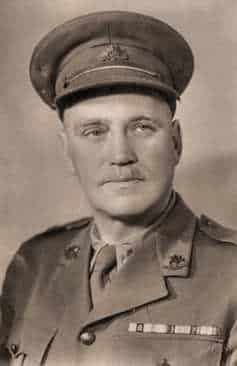
Second C O of Gull Force
The Australian Army’s 1,100-strong Gull Force commanded by Lieutenant Colonel Leonard Roach had arrived on 17 December 1941.
The force consisted of the 2/21st Battalion from the Australian 8th Division, as well as some divisional artillery and support units.
Dutch Colonel Kapitz was appointed Allied commander on Ambon.
On the very day Gull Force disembarked in Ambon, Colonel Roach raised concerns about the lack of reconnaissance missions being conducted, medical equipment, anti-tank weapons and the absence of any field guns!
This request was repeated on 23 December 1941, to which Australian Army Headquarters flatly rejected and reiterated the need to defend AMBON with the equipment and supplies already in-situ.
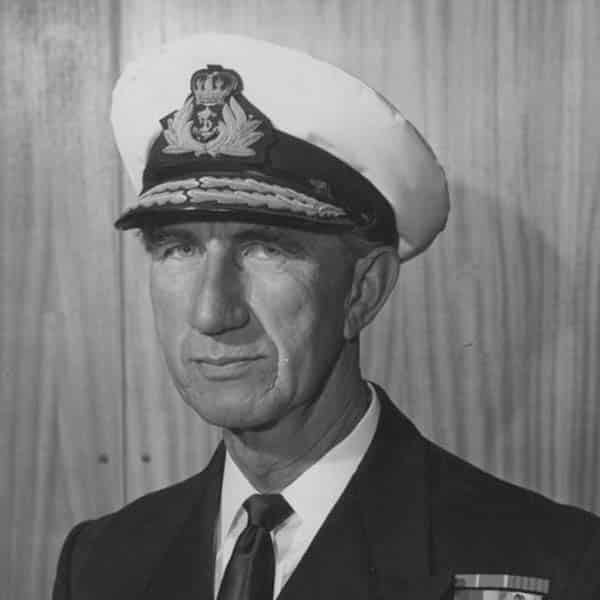
** Lieutenant Colonel Leonard Roach was relieved of his command and replaced by Lieutenant Colonel William Scott – pictured above
OUTCOMES
Lark Force – New Britain:
Japanese carrier-based aircraft began air-raids on Rabaul on January 4, 1942, which steadily increased until January 20 when they were vigorously attacked.
The Australian force proved that it was no match! Wirraway Pilots did their best but again they were no match for the Japanese Zeros and were struck from the skies in just a matter of minutes.
In the pre-dawn hours of January 23, 1942, some 5,000 Japanese soldiers landed at Rabaul. Organized resistance quickly collapsed.
Realizing it would be impossible to defend, the Lark Force commander issued an ‘every man for himself’ order to retreat and disperse.

Most of the men were either killed or captured but it took some three months to capture the remainder, and Japan would pay an enormous price for this delay later in 1942.
In February, the Japanese massacred 160 Lark Force prisoners on Tol Plantation on the southern coast of New Britain.
Officers from Lark Force taken prisoner were shipped to Japan while the enlisted men taken prisoner – over 850 of them – were secured below decks with civilians taken prisoner on the SS Montevideo Maru, a Japanese “hell ship” to be transported to the Chinese Island of Hainan. On July 1, 1942 in the South China Sea the ship was sighted, torpedoed and sunk the by a USN submarine – USS Sturgeon where over 1,000 Australian prisoners and civilians perished.
It remains Australia’s worst ever maritime disaster.
Some 400 men did manage to escape from New Britain and eventually made it back to Australia. Their thanks must go the to the friendly natives who hid them from Japanese Army patrols for weeks until they could lead them to the coast-line and connect with small boat operators to remove them from the Island.
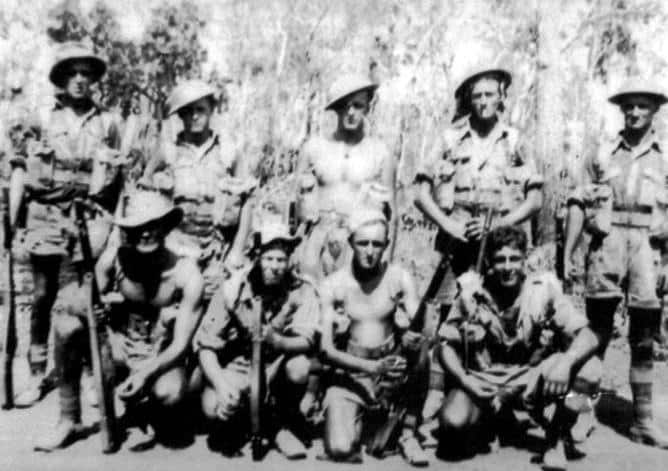
Sparrow Force – East Timor
Sparrow Force landed on the Timor five days after the Japanese attack on Pearl Harbor. This was part of a strategy of seeking to defend forward airfields on Timor.
Although agreeing to garrison Timor with soldiers, Allied commanders did not envisage the scope and size of the Japanese attack on the island. Nor did they have the agreement from the Portuguese to occupy the eastern part of the island; the colonial administration took the extravagantly optimistic view that Japanese forces would respect Portuguese neutrality? But they did not!
Koepang, the centre of Dutch rule, was the focus of the Japanese attack. Facing them were soldiers from the Australian 2/40th Battalion, a battery of Australian coast artillery, and 1,000 Dutch troops.
When superior Japanese forces did invade Timor the Dutch and Australians found themselves surrounded and short of ammunition, but they did hold out until finally surrendering on 23 February 1942.
Their surrender was not known by Australian authorities. As there was no radio communication from them, it was assumed they were either killed or taken prisoner by the invading Japanese Army.
It was not until the 20 April 1942 when a NAVY Telegraphist in Darwin picked up a weak radio signal from the Commando’s around Dilli indicating they were still alive and fighting and urgently needed food, ammunition and medical supplies.
This gave hope, and so regular supply runs from Darwin began and thus became known as the Timor Ferry Service.

A further 250 men of the Australian 2/2nd Independent Company had been sent to the Portuguese Timor part of the island before the Japanese attack. They did not directly oppose the invasion but acted as a guerrilla force. After the surrender of the main Allied force around Koepang, 140 members of the 2/40th and some Dutch troops were able to avoid the encirclement; some were handed to the Japanese by West Timorese, while the remainder made their way across the island to join the 2/2nd in the Portuguese Dilli region.
Timor’s rugged terrain offered ideal conditions for guerrilla warfare, but the early success of these operations was made possible by the support of the Timorese people, who provided food and shelter, ponies for carrying heavy equipment, acted as porters and guides, and helped set up ambushes. Some took up arms themselves and fought alongside the Australians.
Many Timorese were executed by the Japanese for providing assistance to the guerrillas. Assistance also came from the Portuguese who, as representatives of a neutral country, had been allowed to maintain order in their colony.
As Japanese pressure increased, guerrilla operations became more difficult.
The intelligence provided by local people began to dry up and, from the beginning of December 1942, operations were wound down. Early that month the 2/2nd evacuated 190 Dutch troops and 150 Portuguese, who sought refuge in Australia, before leaving the island between 10 and 16 December.
After their departure, the position of the 2/4th became untenable and they were also evacuated on the night of 9 -10 January 1943, on the destroyer HMAS ARUNTA.
The Z Force Lancer group, from Special Operations Australia, left Timor on 10 February 1943, picked up by the submarine USS Gudgeon.
Losses Timor were significant both in terms of killed in action, and those taken prisoner by the Japanese Army.
Gull Force – Ambon
The Battle of Ambon occurred between the 30 January and 3 February 1942 on AMBON Island in the N E I between Australian, British, Dutch and US – the Allies and the Japanese. Imperial Japan sought to occupy this Dutch colony.
But as it turned out even in the face of a combined defense by Australian, British and Dutch soldiers, Japanese forces conquered the island and its strategic airfield in just a few days.
From 6 January onward, Ambon was relentlessly attacked by Japanese aircraft. Allied aircraft replied with their own sorties but had little success against the approaching Japanese Fleet.
The naval aviation base at Halong was soon rendered unusable by Japanese air-raids and was abandoned by the Dutch and U.S. NAVY’s in mid-January.
On 30 January, about 1,000 Japanese marines and IJA personnel landed at Hitu-lama on the north coast. Other elements of the IJA 228th Regiment landed on the southern coast of the Laitimor Peninsula.
Although the Japanese ground forces were numerically not much larger than the Allies, the Japanese had overwhelming superiority in air support, naval and field artillery, and tanks.
The remaining Allied aircraft were withdrawn that day, although RAAF ground staff remained. Within a day of the Japanese landings, the Dutch detachments in their vicinity were overrun and/or had withdrawn towards Paso. The destruction of bridges on Hitu was not carried out as ordered, hastening the Japanese advance.
There was a second wave of landings, at Hutumori in southeastern Laitimor, and at Batugong, near Paso. An Australian infantry platoon was detached to reinforce the pioneers on Nona plateau. The defences at Paso had been designed to repel attacks from the north and west, and now faced assault from the south. A KNIL platoon was detached from Paso to resist the attack on Batugong, causing a gap in the Dutch lines. The Japanese took advantage of this, and were assisted by the failure of a KNIL telephone line resulting in Batugong falling to the enemy on 31 January, enabling the them to encircle the eastern flank of the Passo positions.
Meanwhile, Colonel Kapitz ordered the Ambonese KNIL company at Eri to take up a position at Kudamati, which appeared prone to attack.
At noon on 31 January, he moved his headquarters from Halong to Lateri which would be closer to Passo. Telephone communications between Kapitz and his subordinates, including Australian Army Colonel Scott, ceased when the Japanese cut the lines. The Japanese force which had landed at Hitu-Lama then attacked the Passo defenses from the north-east.
The first land attack on Laha occurred on the afternoon of 31 January. An Australian platoon northeast of the airfield was attacked by a stronger Japanese force, which it repelled. Japanese forces were also approaching the town of Ambon from the south west. At about 16:00 on 31 January the Japanese captured the town, including an Australian casualty clearing unit.
Several Japanese attacks were launched simultaneously on 1 February.
The Australian positions were also receiving large numbers of Dutch personnel fleeing from Paso. At 22:30, Colonel Scott ordered a withdrawal of the Allied forces at Amahusu and the south-west, to Eri. The position at Kudamati was effectively encircled.
After dawn on 2 February, the main Australian force on Nona plateau, commanded by Lieutenant Bill Jinkins, was in danger of encirclement. Jinkins ordered a withdrawal to Amahusu, where he became aware that the Dutch had already surrendered.
Unable to ascertain the disposition of Colonel Scott’s force, Jinkins decided to meet senior Japanese officers under truce at the town of Ambon. They allowed him to speak to Dutch Colonel Kapitz, who advised the Australian commander to surrender.
Meanwhile, the Japanese forces attacking Laha were reinforced and a concentrated assault on the Allies began, including naval artillery, dive bombers, fighter planes and probing attacks by infantry. A Japanese night attack in high grass near the beach, between two Allied positions, was beaten back by an Australian platoon.
However, a massive Japanese offensive commenced at dawn on 2 February.
By 10:00 only about 150 Australians and several KNIL personnel were still able to fight at Laha, and Newbury ordered them to surrender.
By the morning of 3 February, the Australians around Eri were struggling to cope with increasing air and naval attacks, wounded Australians, the influx of Dutch personnel, diminishing supplies and widespread fatigue. A Japanese flag had been seen flying on the other side of the bay, at Laha. By the time Jinkins reached Scott, the latter had himself met the Japanese and decided to surrender. The Allied position at Kudamati was surrendered separately at midday.
While the attempts by the Allies to maintain control of Ambon was courageous, the lack of air cover and the lack of field gunnery batteries enabled the Imperial Japanese Army to overrun the resistance in just six days.
AFTERMATH
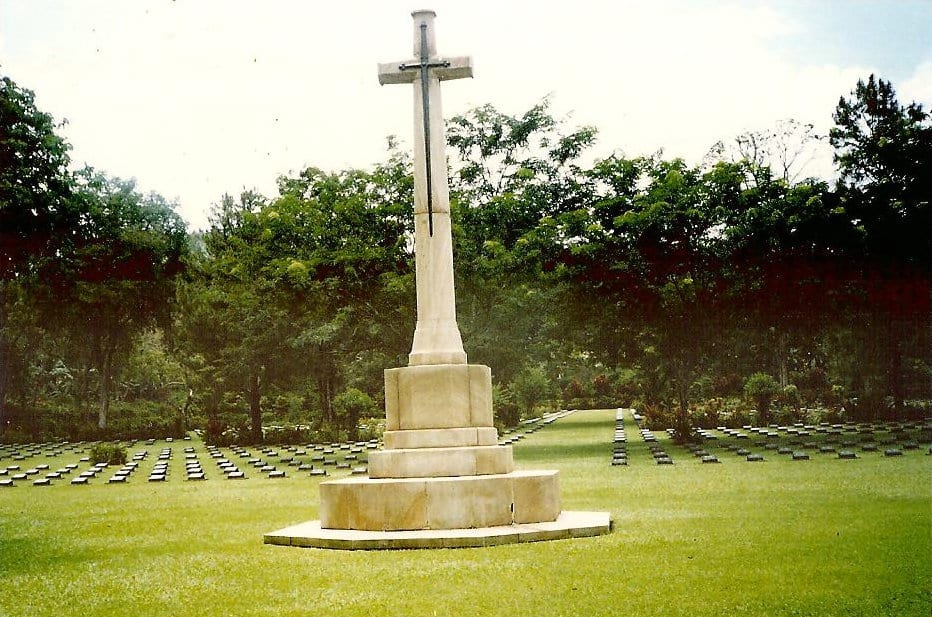
The Ambon War Cemetery currently holds the graves of 1,956 servicemen, mostly Australian, British and Dutch.
Allied casualties in the battle were relatively high, and shockingly at intervals for a fortnight after the surrender, Imperial Japanese Navy personnel chose more than 300 Australian and Dutch P O W’s at random and summarily executed them, at or near Laha airfield.
About 300 of those men who surrendered at Laha airfield on Ambon were killed in four separate massacres around the airfield
They were bayoneted, clubbed to death with shovels or beheaded. None survived. In part, this was revenge for the sinking of the Imperial Japanese Navy minesweeper, as some surviving crew of the minesweeper took part.
Those killed, included Wing Commander Scott RAAF, and Major Newbury.
Over the ensuing three and a half years, the surviving POWs suffered an ordeal and a death rate second only to the horrors of Sandakan, first on Ambon and then after many were sent to the island of Hainan, a Chinese Island.
Three-quarters of the Australians captured on Ambon had died before the war’s end.
Of the 582 who remained on Ambon, 405 died. They died of overwork, malnutrition, disease and one of the most brutal regimes among camps in which bashings were routine
In 1946, incidents which followed the fall of Ambon became the subject of one of the largest ever War Crimes Trials:
93 Japanese personnel were tried by an Australian Military Tribunal at Ambon.
Rear Admiral Hatakeyama, IJN was found to have ordered the Laha massacres, however he had died before he could be tried.
Commander Kunito Hatakeyama, IJN who was in direct command of the massacres, was sentenced to execution by hanging.
Lieutenant Kenichi Nakagawa was sentenced to 20 years imprisonment.
Three other Japanese officers were executed for mistreatment of POWs and/or civilians on other occasions, during 1942 – 45.
General Itō was sentenced to death that same year for war crimes committed in other parts of the Pacific.
Approximately 30 Australian soldiers, including Lieutenant Jinkins, escaped from Ambon, in the space of several weeks after the surrender, often by rowing canoes to Seram.
Another result of the Japanese capture of Ambon was the realisation of Australian fears of air attacks, when Imperial Japanese Navy aircraft based at Ambon took part in major air raids on Darwin, on 19 February, 1942 and continued through to November 1943.
CONCLUSION
The courage, tenacity and resilience demonstrated by all who served in these theatres during the Second World War in the Pacific should continue to serve as a barometer for all Australians, who should further acknowledge that the freedoms they all enjoy today are a consequence of the actions of their forebears.
* * * * *
LEUT R S Read RANR (Rtd)
Glenelg SA
10 Mar, 2024